UsenetExpress VPN
Setup VPN on Synology
Setup VPN on Synology
We’ll walk you through getting the Synology connected to the VPN in this guide
Pre-requisites:
- A UsenetExpress VPN username and password. Activate the VPN in the Member’s Area of the website.
- Download the UsenetExpress certificate
1. Login to Synology web interface
- Open the Control Panel
- Go to Network
- Go to Network Interfaces
- Create VPN Profile

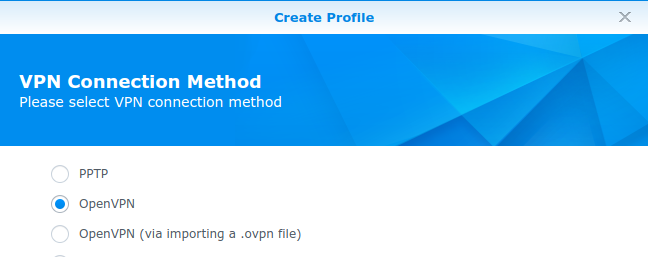
2. Select OpenVPN as the connection method -> Click Next

3. Fill in the General Settings as shown -> Click Next
- Profile name – UNE
- Server address – gw3.iad1.slickvpn.com (or choose a different gateway)
- User name – Your UNE VPN username
- Password – Main account password
- Port – 8888
- Protocol – UDP
- Certificate – Browse to the UNE_VPN.crt file previously downloaded

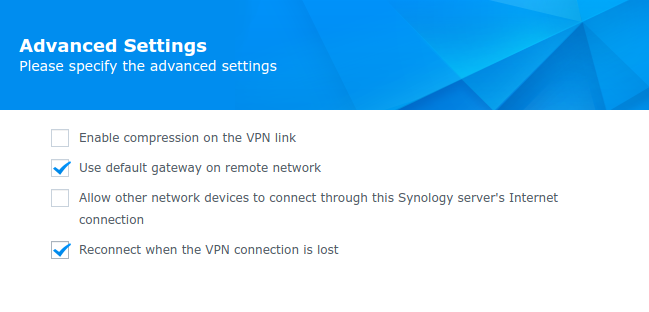
4. Fill in the Advanced Settings as shown
Check Use default gateway on remote network Check Reconnect when the VPN connection is lost.

5. SSH to the Synology as ‘admin’ user
example: ssh [email protected]
- Run the following commands
sudo -i [enter Synology password]
cd /usr/syno/etc/synovpnclient/openvpn
ls -al
6. Check for the ID number of the VPN connection
- This will be specific to your Syno
- Save this number for the next steps (1521637201, in this example)

7. Download the config file from our servers
wget https://www.usenetexpress.com/ovpn/une.cfg
8. Update the new config
- Use the number from step 6
sed -i 's/UNE/**number**/g' une.cfg
- Copy the une config to client_oXXXXXXXX. This will leave a backup copy of your configuration in case you have to make any changes in the GUI later.
cp une.cfg client_o********
9. Go to Synology web interface
- Highlight the VPN - UNE interface
- Click Connect

