UsenetExpress VPN
Quick Start and Help guide for VPN client
Quick Start and Help guide for VPN client
We’ll show you how to get started quickly and easily with the UsenetExpress VPN client in this guide
Pre-requisites:
- UsenetExpress VPN client WindowsXP - Windows11 or MacOS
- A UsenetExpress VPN username and password. Activate the VPN in the Member’s Area of the website.
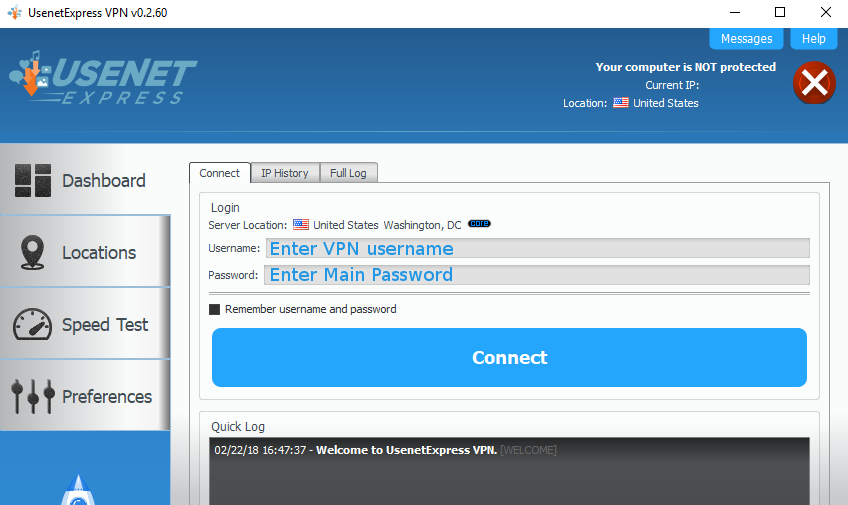
1. Dashboard
- Connect - Enter username and password and click connect to start the VPN connection.
- IP History - disabled by default - enable to save information about past connection
- Full Log - disabled by default - enable for troubleshooting or at support request

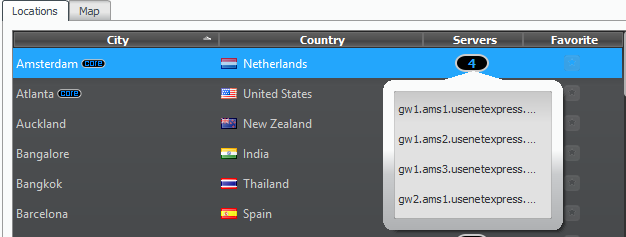
2. Locations
- Click the ‘Locations’ tab on the left side of the screen to switch tabs.
- Use this tab to quickly sort through locations by city, country, amount of servers, or favorites.
- Double click any location to connect immediately.

Click the number by an entry to see and select individual servers

3. Speed Test
Use the built in tool to test the fastest servers for your location

4. Preferences
- General
Use this tab to set various options for client startup

- Networking
Use this tab to change ports, protocols, and enable/disable the kill-switch (Leak Protection)

- Advanced
Use this tab to set additional OpenVPN command line parameters (one command per line, preceded with dash-dash)

